Items Needed: Brush or comb, spray bottle, one hair tie, hairspray {if desired}, (optional) a few bobby pins
Time Requirement: 5-10 minutes
Skill Level: Medium

Step-by-Step Instructions:
- Part the hair, using the comb, from ear to ear across the top of the head…
- Secure the back half of the hair with a hair tie to keep it out of the way for now…
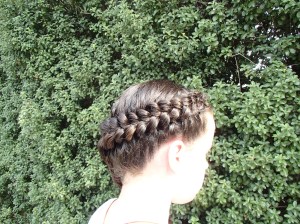
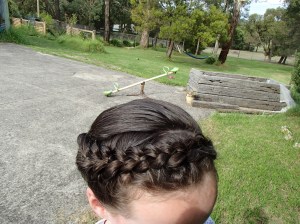
- Now begin a Dutch braid near the left ear (essentially a reverse French braid) .
- As you go along, try to keep the braid as close to the hair line as possible, towards the front of the face…
- Continue braiding, in this same way, until you get to just before the right ear and release the remaining hair and continue adding hair into the braid down and around the back of the head until you run out of hair at the other ear…
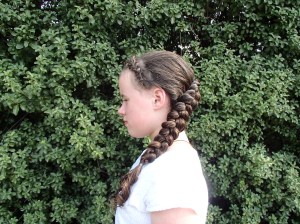
- At this point, you can continue on by finishing a simple braid down the remaining hair, and secure with an elastic
- I prefer to pancake the braid, by tugging on the elbows of the braid, to flatten it and help the braid look bigger and looser. {You do not have to do this, but I love how it looks!}
If you would like more posts like this, leave a comment below telling me what kind of hairstyles you would like to see.


Leave a Comment